Tuesday, September 13, 2011

Risotto Cakes with Goat Cheese


Every timeI make risotto I make sure to double the recipe so that I have a lot of left-overs.As I noted in another risotto cake post, some restaurants actually make risottojust for the cakes. Once you taste one (good one, that is), you will definitelylook forward to the next one.
When I madeChickenand Mushroom Risotto I made it really creamy. Really great as a risotto butit is a problem when you try to form a cake with the left-overs. I had no choicebut to mix it with little bit of bread crumbs to give it some body.
To make thecake I chopped the leftover chicken and mushrooms, mixed them with soft goatcheese and formed a small ball. Then I formed ball with risotto, made deepindentation in risotto ball, placed goat cheese ball inside, enclosed it andflattened it to form a cake or pate about 3” in diameter and inch and halfhigh. Next came 3-step breading job: first, coat cake in flour, then beaten eggand finally Panko. Press the Panko in so it doesn’t get loose when placed inhot oil. I shallow fried the cakes till light golden brown on all sides. In 10minutes it was ready to be served with arugula and cherry tomatoes andfreshly grated Parmigiano cheese on top.
I just lovethe texture of crisp Panko on the outside and soft risotto and creamy goatcheese on the inside, all in one bite!

Saturday, September 10, 2011

Steamed Pearl Balls - Chinese Dim Sum


Chen-chu-jou-wan
These steamed pork meat balls coated in sticky rice are not only favorites in Dim Sum restaurants but at formal Chinese banquets as well. They are so easy to make, especially if using store bought ground meat. Since I never buy ground meat it takes me few minutes longer to prepare, but for me it is worth the time and effort since I know exactly what is in my meat. Same pork mixture can also be used in wontons for soup and also pot stickers. It is very versatile recipe.
 Ingredients
3/4 cup sticky rice
1/2 teaspoon salt
1/2 tsp. white pepper
1 tsp. sugar
1 Tbs. cornstarch
3/4 pound pork butt or equivalent ground pork
1/2 Tbs. fresh ginger, minced
2 tsp. chopped garlic
1 tablespoons water chestnut, finely chopped
3 green onions, minced
2 shitake mushrooms, soaked and chopped fine
1 Tbs. Sake or rice wine
1 tsp. soy sauce
1 tsp. sesame oil
1 Tbs. peanut oil
1 large egg, beaten
Napa or Savoy cabbage leaves

Soak sticky rice in water for minimum 8 hours, preferably overnight.
Drain well in colander and leave the rice in the colander over a bowl to catch water drippings.
If using pork butt, grind the meat using 1/4” plate.
Mix salt, pepper, sugar and cornstarch in a small bowl.
Place the ground pork in a large mixing bowl together with ginger, garlic, water chestnuts, onions and mushrooms and mix with your hands until the mixture is well combined. Add dry mix and mix till mixture is smooth.
With a spoon scoop out about 2 tablespoons of meat mixture and roll it in palm of your hands forming uniform ball. Place the ball on a baking sheet lined with parchment paper. Repeat till all balls are rolled. I prefer to scoop out all the meat first and then roll all the meat at the same time.
Firmly roll the meat balls in colander holding the rice until rice completely covers the meat. It is lot easier to do if you firm up the meat balls in freezer for about 20 – 30 minutes first.

Line a bamboo steamer with cabbage leaves. Place balls 1/2 inch apart in steamer and cover with steamer lid. Add water to a large skillet to a depth of 1 inch and bring to a boil. Place steamer in skillet, and steam balls 20 minutes or until rice is tender. Remove balls and cabbage from steamer and serve with soy and Chinese red vinegar dipping sauce.


This Chinese aluminum double-decker steamer is one of the most useful utensils in my kitchen. (This picture shows only one basket being used.)

Thursday, September 8, 2011

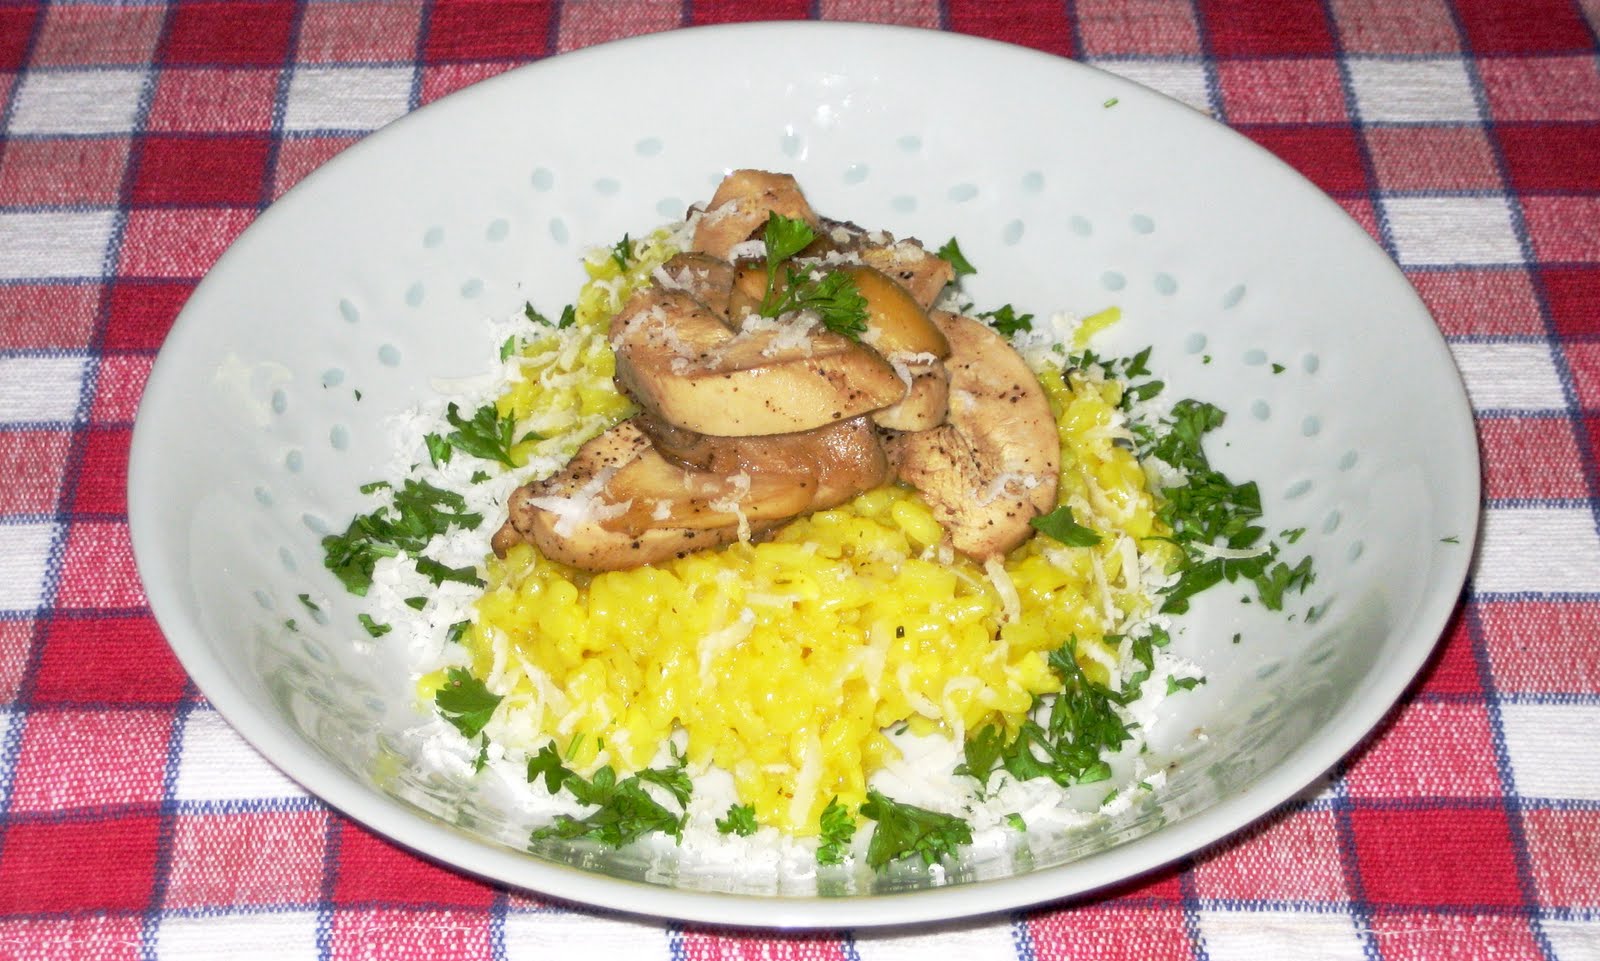
Chicken and Mushroom Risotto


Last few days I had craving for nice creamy risotto so I checked my posts to see what kind I cooked last time. I was very surprised that I didn’t post any regular rise risotto recipe, none at all!
Risotto is so versatile. You can prepare it with so many different meats and vegetables and mix them right in risotto at the end of cooking or serve them on top. Since I bought King Oyster Mushrooms and farm fresh chicken breasts I wanted to use these two ingredients as a main topping. I just love these mushrooms for their taste and texture. Also, since I do have saffron on hand at all times, the risotto I have made was classical “Risotto alla Milanese”.

Ingredients

3 tsp. olive oil
3 Tbs. butter
2 1/2 cups fresh mushrooms, sliced
2 skinless chicken breasts
1-1/2 cups Arborio rice
3 shallots
4 garlic cloves, crushed
1/2 cup dry white wine
Pinch of Saffron
4-1/2cups chicken stock (heated)
1/2 cup of freshly grated Parmigiano cheese
2 Tbs. chopped fresh parsley
Oil
Salt & pepper
Directions
Heat 1 tsp. of oil and 1 Tbs. of butter in skillet. Add mushrooms and toss to coat all slices. Cook till mushrooms show nice color (do not move them too much). When done, remove to bowl and keep warm.
Preheat oven or toaster-oven to 375 °F. In the same skillet where you cooked mushrooms, add 1 Tbs. butter and 1 tsp. oil and cook chicken breast for about 3 minutes on each side or until both sides are golden brown. Sprinkle both sides with salt and pepper, place in baking dish (I use steel pie plate) and roast in oven for about 15 minutes or till juices run clear when pierced with sharp pointed knife. Do not overcook! Remove from oven, cover with foil and let the breasts rest but keep warm.
In the same skillet that you cooked mushrooms and chicken, sauté shallots and garlic in remaining butter and oil until shallots are translucent. Add the rice and stir until the rice turns opaque, about two minutes.
Add the wine to the rice and stir frequently until the wine has been absorbed into the rice.
Add 1/2 cup of the heated chicken stock and stir until absorbed. The rice and stock should bubble gently.
Continue to cook the rice, adding chicken stock 1/2 cup at a time and allowing the rice to absorb it before adding the next 1/2 cup. Taste for seasoning and adjust.
Cook rice until al dente, about 25-30 minutes.
With the addition of last batch of stock add the grated parmesan cheese and 2 Tbs. of butter and stir thoroughly.
Remove from heat when the risotto is thick and creamy.
Serve on pre-heated plate or bowl, top with mushrooms and slices of chicken breast and garnish with freshly grated Parmigiano and parsley.  
Serve immediately.

Wednesday, September 7, 2011

Cook Ahead Risotto

To cook ahead:
With this technique you never have to stand at the stove, stirring, for 30 minutes while your guests wonder where you have gone. You can make any kind of risotto you want using this method. This method is used by restaurant chefs.
A standard recipe of 4 servings uses 5 cups liquid (wine and stock) to 1-1/2 cups Arborio rice.
Prepare your risotto according to your recipe, but use only 3 -1/4 cups liquid. You will use the remaining 1-3/4 cups to finish the risotto. Cook on medium-low heat until 3-1/4 cups of stock is absorbed.
Remove the rice from heat. If you are going to use it within few hours, just keep it on side, covered.
10 minutes before serving
Remove chilled rice from refrigerator and bring to room temperature. Place the remaining 1-3/4 cups liquid in a wide pot or sauté pan; heat to a simmer over medium-high heat. Reduce heat to medium and add the partially cooked risotto. Stir with a wooden spoon until the stock is absorbed, approximately 4 to 5 minutes or until rice is tender but still firm (the rice is done when it is tender, but firm to the bite). Turn off the heat and immediately add the remaining butter and Parmigiano cheese, stirring vigorously to combine with the rice. Add salt and pepper to taste and serve immediately.

Tuesday, September 6, 2011

Chicken and Polenta Soup Balls

As I mentioned on my “Baked Pimento Pepper Halves” post, I made these dumplings using minced chicken and polenta instead of usual matzo meal or bread crumbs. It was an experiment that turned out better than I had expected. It started quite innocently with polenta experiment. I had an e-mail thread going with my favorite nephew Seb about cooking polenta. I wanted to know if it can be cooked in microwave. I took 1/2 cup of chicken stock and nuked it for 45 seconds on 100% power, then mixed in 1/4 cup fine ground corn and cooked another 45 seconds on 75% power, uncovered. And, what do you know; it had a decent texture and tasted cooked, it was actually pretty good even though it was on a dry side. I left it on my kitchen island and started to prepare new chicken-on-skewers recipe from Cooks Illustrated where chicken breast is kept moist by coating it with bacon paste made in mini-chopper. I made the paste with 2 cloves of garlic and then I changed my mind about the skewers, there just wasn’t enough meat for two people. Eureka! Chicken dumplings for a soup!
I cut up the breast into small pieces and then minced it in mini chopper together with 1 egg, 1/2 tsp. of salt, 2 Tbs. of chopped garlic chives, 1/2 tsp. marjoram, 1/2 tsp. baking powder and 1/2 tsp. of white pepper. Then I mixed in the polenta, formed it into 1-1/2” balls and slowly simmered in salted water for 15 minutes. They came out nice and fluffy (baking powder J).
These are now my favorite dumplings for a chicken noodle soup.

Monday, September 5, 2011

Korean Zucchini Pancake

Hobakjeon  호박전
Last few days I had cravings for potato pancakes (or Čmunda in Czech) but it is a winter or cold weather meal. While browsing through other food blogs I came across zucchini version and since I bought bunch of zucchinis at local farmers market my plan was formalized. There is nothing like eating local and in season, right?
This pancake is great for nice quick lunch and can be eaten hot or at room temperature.
My version is based on recipe from Maangchi’s blog that I follow on regular basis. She also has her own channel on YouTube.
Ingredients
2 medium zucchini (I used 1 green and 1 yellow)
3 green onions
2 cloves garlic, very finely chopped
1/2 tsp. salt
1/2 tsp. white pepper
1 large egg, beaten
1/2 cup flour
1/2 cup water
1 tsp. sesame oil
Peanut oil for frying

Julienne zucchini (matchstick size) and shred green onions. You should have about 2-1/2 cups of zucchini and 1/2 cup of green onions.
In large mixing bowl beat the egg and then add salt, flour, pepper, garlic and water and mix until well combined and smooth.
Add zucchini and onions and mix thoroughly with spatula.
Heat 12” non-stick frying pan, add 1 Tbs. of oil and when hot add about 3/4 cup of pancake mixture. Spread it evenly, making fairly thin pancake. Press down with spatula to get even browning on bottom. Add some sesame oil around the edges to help the browning. When edges are golden brown, about 2 minutes, flip or turn over and cook another 2 minutes. Again, add 1 tsp. of sesame oil around the edges.
Transfer to heated plate and keep warm while frying rest of the pancakes.
I know that it is basically traditional Korean dish and is served with spicy sauce but I served it with sour cream and sliced strawberries. Nice contrast in texture and taste!

Done just right!

Note: Do not let the frying pan get too hot or you end up with burned edges and raw center.

Sunday, September 4, 2011

Baked Pimento Pepper Halves

Stuffed with Minced Chicken Breast


While rummaging in my freezer I came across vacuum packed chicken breast. Just one chicken breast is not enough to feed 2 people unless I use it in stir fry or with risotto or lots of pasta. None of these options appealed to me, I just had to come up with something that I haven’t done before. Last week I made soup dumplings using minced chicken breast, egg and polenta (!) instead of bread crumbs so I figured I could follow same process. Then I remembered one of our favorite dim-sums: fried and steamed green pepper halves stuffed with ground pork! I have a lot of red pimento peppers in my veggie garden (that I grew from seeds J) so I have decided to use them. They are just perfect size for quick bake, about 2” wide and 4” long. Problem: chicken breast is the leanest meat on the planet and because of that I will have to add some good fat. I figured since everybody (among normal people) loves bacon, why not take couple slices of bacon, chop it and then pulverize it in mini-chopper to add some taste and moisture. New recipe was done, at least in my head.
 Ingredients
1 chicken breast (1 halve), cut into 1” cubes
1 clove garlic
1/2 tsp. salt
2 slices smoked bacon, roughly chopped
1/2 cup toasted bread crumbs
1 egg, beaten
1/4 cup milk
1/2 tsp. ground black pepper
1 tsp. Hungarian paprika
1/4 tsp. dried thyme
1/4 tsp. dried marjoram
1 Tbs. chopped garlic chives or French chives
6 small red peppers
Oil for initial frying

Process
Wash and dry peppers and cut off excess stem.
Split in half lengthwise, remove seeds, white ribs and cut across the stem and as close as possible to pepper wall. You should have only small green knob left.
Place garlic and bacon in a mini-chopper or food processor and process until bacon has a paste consistency.
Scrape the sides of processor bowl and add chicken and pulse until chicken is well minced.
Place bread crumbs, paprika, salt, thyme, marjoram and chives into mixing bowl and mix until well combined.
Mix beaten egg with milk and pour in bread crumb mixture and mix. The crumbs should form small pellets.
Mix the chicken mince with bread crumbs and mix until mixture is well combined and smooth. You should be able to form a ball that holds its shape. Adjust the consistency if needed by adding more milk if dry or more bread crumbs if too runny.
Take a teaspoon of the mixture, make a small pate and fry in little oil to test for seasoning, mainly if it is salty enough since bacon differs a lot in how salty the slices are. Adjust if needed.
With spoon, stuff the peppers with mixture, pressing the meat in all corners and stuffing it a little bit higher than the rim of the pepper. It should have a little mound above the rim.
Preheat oven to 400 °F and place rack in middle.
Heat about 1/2 cup of oil in small frying pan and shallow fry meat side of pepper till golden, about 20 – 30 seconds. Fry only 2 halves at the time, they are very slippery and hard to handle. When seared remove peppers with tongues to plate lined with paper towel. Repeat for rest of peppers.
Place peppers meat side up on a wire or roasting rack and place the rack on baking sheet. (I used my BBQ grill so I’ve omitted the baking sheet and roasted them on warming rack that is higher than cooking grill.)
Bake for 20 minutes.
To Serve
Only you imagination will direct you in how many ways you can serve these stuffed peppers. Simplest one, and the one I used when I served them freshly baked, is just as it is: on a bed of lettuce or arugula with a baguette toast rubbed with garlic and fresh tomatoes. Other suggestion are that you can cut the peppers across into 1 inch slices and put them on top of toasted baguette slices…or serve them in a hot tomato sauce with, you guessed it, garlic rubbed and toasted baguette slices. This was today’s reincarnation of this great meal. Hmmm, it looks like we do like toasted baguette slices rubbed with my very own hard neck garlic. I have to agree, we do. It makes a great base for almost any toppings.

Peppers are ready for initial browning.
Caramelized and ready for baking.

Burners on right and left were on full and two center ones were on low.

  Ready for any way you want to serve them.