Sunday, January 30, 2011

Braised Smoked Ham Surprise

This is not a recipe, just an observation of braising process or more accurately put, interrupted braising process.
Late this morning I have decided to braise one of smoked hams that I bought last week on special and then remove all the fat and bones and vacuum pact it and freeze it. So, I put the ham in large pot, poured in water half way up, brought it to boil, covered, stuck a thermometer probe half way in and placed in 350°F oven. The normal braising thing, right? Well, after one hour we had to leave the house for about an hour and since I didn’t want to leave the oven on I took the temperature reading. The pot was sitting on a pizza stone that is always in my oven and infrared gun read 365°F and the meat inside was 68°F (the meat was 36°F when I stuck the probe in). When we came back one hour later I repeated measurements and while the pizza stone went down to 228°F (137°F loss) the meat gained astonishing 60°F – 128°F! When I turned the oven back on it was done at 160 °F in less then half hour. That means that even though I cooked it for 2-1/2 hours, oven was on for only 1-1/2 hour, just a bit over half the cooking time. I think that I am up to something here, don’t you think? Right now I’m braising another ham and will try to repeat the process. Why waste natural gas!
Of course, it is not a mystery at all, just simple physics. After all, even though the oven wasn’t on, the ham was still in 220°F water in a pot that was in turn surrounded by hot air and most likely boiling for a long time so the cooking of the ham continued.
Update:
I have cooked another ham (they were on special J) same way and had exactly same results. After turning off the oven and not opening the door, the temperature kept climbing by one degree a minute for full hour.

Friday, January 28, 2011

Marsala Veal with Cremini and Oyster Mushrooms

This must be one of the easiest veal dishes I’ve done in a while. Once first two steps are done it is just let it be and leave it alone. Being a braise it is also almost impossible to photograph well. Pictures you see in food magazines are staged with almost raw ingredients whereas I take a shot and then eat the “prop” before it gets cold.
I have to admit that I have improvised a bit as the food was cooking and I will include all steps. By the way, my better half has pronounced it as the best veal she has ever had and I have cooked a few in the last 35 years or so.
I cook for two so all my recipes reflect that in ingredients amounts.
Ingredients:
Veal shoulder blade chop
1 Tbs. olive oil
1/2 onion
Sprig of fresh rosemary or 1 tsp. of dried
1/2 tsp black pepper
1 cup dry Marsala
Chicken stock (to add during braise)
2 cups sliced cremini mushrooms
1 cup oyster mushrooms
1 small carrot, sliced
1 stalk celery, sliced
1 Tbs. cold butter
Salt, pepper
Parsley, chopped
Process:
Coat veal chop in flour and shake off excess.
Heat a heavy bottomed pan large enough to accommodate veal chop on medium high and add olive oil. Place chop in and sear without moving for about 4 – 5 minutes. When golden skin forms turn over and cook another 5 minutes. Remove to plate and cover with foil.
Lower heat and add onions and cook till translucent.
Off the heat pour in Marsala and deglaze all bits stuck to bottom of pan, add rosemary and pepper and return to heat. Reduce Marsala by half.
Return veal to pan with all accumulated juices and add cremini. Make sure that veal is half submerged in liquid at all times. If not, add chicken stock. At this point the meat is not salted.
Meanwhile boil potatoes or noodles for side dish.
Reduce heat to low so that liquids just barely simmer, cover and braise for 1-1/2 hours. Check for liquid level every 20 minutes or so.
Turn chop over and add carrots, celery and oyster mushrooms and salt to taste. Cover and braise another half hour.
Remove chop to plate, debone, cut into serving pieces and keep warm.
To finish, reduce sauce and stir in cold butter cut into 1” pieces.
Serve the veal with sauce on top and with side dish of your choice.

Thursday, January 27, 2011

Potato Pancake with Broccoli and Curry

Yesterday I have received a fine shredding disk for my Cuisinart 11 cup Pro food processor (great for making pizza dough) and somehow got craving for latke. What a timing! I had baking potato so all I needed was egg and little flour. When I reached for egg carton I got glimpse of broccoli and decision was made. Since I always add little curry into my cream of broccoli soup I thought that it will go well in pancakes. Great decision! Since it is so quick to make now that I don’t have to grate by hand it is a weekly snack for sure.

To make 2 large or 4 smaller pancakes:

1 large russet baking potato, finely grated
1 egg, beaten
1/2 cup broccoli, chopped
2 Tbs. flour
1 tsp. Malaysian or Indian curry
Salt and pepper to taste
2 Tbs. olive oil

Preheat non-stick frying pan on medium high heat with oil.
Mix grated potato with salt, pepper and curry.
Add egg and broccoli and mix till well combined.
Mix in flour and combine.
Pour 1/2 cup of potato mixture into hot pan and spread about pencil thin.
When golden brown on bottom, about 5 minutes, turn over and crisp other side.
Repeat till done.
Serve as is or with yogurt or sour cream.

Wednesday, January 26, 2011

Mussels and Linguine in Wine Sauce

While passing by a fish counter at our local Metro supermarket I spotted my favorite fish counter server removing mussels from just received box and placing them in display case. Well, another meal idea was born even though the reason I went shopping in first place was to get my veal chops that I had a rain check for. Mussels can’t wait but veal surely can. These were fresh as well so one day will not hurt. Braised veal chops in mushroom sauce will be my post for tomorrow. Anyway, today’s recipe is basically Linguine con le Vongole but instead of clams I’m using fresh mussels and since I made big batch of fresh pasta two days ago I served it with fresh linguine. And what a treat it was!

Ingredients
3 to 4 Dozen  
1/2 cup Extra Virgin Olive Oil
4 to 6 cloves garlic , sliced
1/4 teaspoon Dried Thyme
1/4 teaspoon Dried Basil
1/4 teaspoon Dried Chervil
1/4 teaspoon Red pepper flakes
3/4 cup White wine
1 cup Italian parsley, chopped
1/2 pound Linguine

Preparation Directions
  1. Clean and scrub the mussels, and discard any open ones.
  2. In a large stockpot heat the olive oil over low heat, add the garlic and sauté until just fragrant.
  3. Turn up the heat to medium-high and add the mussels. Cover the pan and steam the mussels until they open, about 3-5 minutes. Occasionally shake the pan to help them cook.
  4. Check the mussels. Those that didn't open, take a small paring knife and try to help them open. If they open and smell good, then you can use them. The stubborn and/or the bad smelling ones, discard.
  5. Turn down heat to medium-low and remove the lid. Pour the wine over the mussels and deglaze. Remove the mussels to a side dish, cover to stay warm.
  6. Add the herbs and reduce the wine by 1/3. When reduced, stir in the parsley and remove form the heat.
  7. Meanwhile, cook linguine in a large stockpot or pasta pot of boiling salted water. When the pasta is al dente, drain the pasta, then toss the pasta with the sauce.
  8. Divide the pasta between individual dinner plates. Arrange the mussels attractively around each plate and serve with a little additional fresh parsley on top for garnish.

Definitely more friendly way to serve this meal. Not as photogenic but so much easier to eat!

Cream of Corn and Avocado Soup

While I was putting Cannelloni in the freezer I have noticed a bag of corn kernels that we saved last summer. Out came the corn and since I have also spotted avocado in a basket on my kitchen island, recipe for a meal was born. Because this recipe is sort of Mexican in nature I have included lime and cilantro as well.

2 cups corn
1 avocado, pit and skin removed
3 cups chicken stock
1/2 cup heavy cream
Juice from 1 lime
Salt and white pepper to taste
Coriander leaves (cilantro), chopped avocado and roasted cashews for garnish

Put corn, avocado and chicken stock in a blender and liquefy for at least 2 minutes. Strain into a soup pot through medium mesh strainer pressing on solids to remove as much corn milk as possible. Of course, if skin from corn kernels doesn’t bother you, you can omit this step.
Place pot on medium heat and bring to slow simmer. Add cream and bring back to simmer, flavor with lime juice, salt and pepper. Serve in a bowl and garnished with cilantro, chopped avocado and cashews.
If you are using fresh corn, steam the corn for 10 minutes first.
This soup must be excellent in summer served cold.
Serves 2

Monday, January 24, 2011

Cannelloni

Made with Fresh Egg Pasta
What I have seen personally, Fresh egg pasta cannelloni is an Italian wedding favorite. If everything is done from scratch, like Italian banquette halls usually do, it is job for good part of a day and very labor intensive but worth every step and every minute put into producing this meal.
It is not important if you do pasta or filling first but it is more time saving to make the dough first and while it is resting in a fridge, as it must for at least 30 minutes, you start on filling. As I have previously posted recipe for Fresh Egg Pasta, I will not repeat it here. This post is long enough as it is.
Cannelloni Pasta:
To cook pasta, trim fresh pasta sheet into 4” wide sheets and then cut into 4” squares. Save trimmings in a plastic bag with 1 Tbs flour for soup or pasta and sauce dish.
Bring large pot of salted water to boil. Meanwhile, place large steel bowl with cold water next to pot for cooling down cooked pasta. Have a large tea towel ready.
When water is boiling drop in pasta squares one by one and stir to separate them. Boil for 4 minutes and remove to bowl with cold water with slotted spoon. Immediately straighten the sheets and place them flat on towel. Cook rest of pasta same way. Cover pasta with another wet towel and reserve.


To make the filling that can also be used in Ravioli you will need:
Ingredients for Filling:
3/4 lb. ground veal
1 medium carrots, chopped
1/2 stalk celery, chopped
1/4 cup chopped onion
Frozen spinach (10 ounce package), thawed, excess moisture squeezed out
1 teaspoons salt
1 teaspoons white pepper
2 tablespoons extra-virgin olive oil
1 cup dry white wine
1/4 cup heavy cream
3/4 cup smooth ricotta cheese
1/2 cup grated Parmesan cheese
2 eggs, beaten
2 teaspoons dry Italian herbs
2 tablespoons chopped fresh basil

Preparation:
In a medium hot frying pan add 1 Tbs. of olive oil and sauté onions, carrots and celery until soft and then add spinach. Add salt and pepper and mix well. Remove to large mixing bowl.
In same frying pan add another tablespoon of oil, then the meat and brown lightly. Break apart any clumps that will form. Add wine and cook till all liquid cooks away. Stir frequently.
Remove to bowl with spinach mixture and combine. Add cream, Parmesan cheese, ricotta cheese, beaten eggs and dry herbs and basil. Mix till well combined. You should be able to form a cylinder with the meat mixture.
Fresh Tomato Sauce:
Place 1 can (about 15 ounces) tomatoes and their juice in food processor; process until smooth.
Heat 2 tablespoons virgin olive oil over medium heat in a large skillet. Add 2 cloves minced garlic and 1/2 cup chopped onion; cook until soft. Add the processed tomatoes, 1 teaspoon each salt and pepper, and cook 5 to 10 minutes or until liquid is no longer watery. Add four chopped fresh basil leaves or a little dried leaf basil, and cook 1 minute longer.

Assembly:
Cooked pasta sheets
Meat and Spinach filling
Béchamel sauce
Tomato sauce
Grated Mozzarella cheese


Place enough filling at front edge of pasta sheet to form about 1 ½” diameter cylinder and make a tight roll. When all are done, set aside.
Preheat oven to 350°.
In a bottom of ovenproof serving dish or baking pan pour tomato sauce and then thin layer of Béchamel sauce. Place rolled cannelloni on top and repeat with layers of tomato and Béchamel sauces. Top with grated Mozzarella or Provolone cheese. Bake for 20 minutes or until sauce is bubbly and cheese has melted.

Béchamel Sauce

As a mother sauce, Béchamel sauce is used in so many dishes, either on its own or combined with other sauces. It is hard to imagine Lasagna, Cannelloni or Manicotti without this creamy sauce. Just add some grated Gruyere or other melting cheese and you have a Mornay sauce.

Ingredients

5 tablespoons butter
4 tablespoons all-purpose flour
4 cups milk
2 teaspoons salt
1/2 teaspoon freshly grated nutmeg

Directions

In a medium saucepan, heat the butter over medium-low heat until melted. Add the flour and stir until smooth. Over medium heat, cook until the mixture turns a light, golden sandy color, about 6 to 7 minutes.
Meanwhile, heat the milk in a separate pan until just about to boil. Add the hot milk to the butter mixture 1 cup at a time, whisking continuously until very smooth. Bring to a boil. Cook 10 minutes, stirring constantly, then remove from heat. Season with salt and nutmeg, and set aside until ready to use. This sauce freezes well.

Fresh Egg Pasta

Made With Food Processor
If you have never made fresh pasta, give it a try using this recipe, it is so easy. There is such a big difference in taste and especially texture between fresh egg pasta and store bought dry pasta. Now, that I found this recipe (on Internet, of course) I will make my own much more often but in smaller batches.

Ingredients:
2 eggs
1 tbs olive oil
1/4 tsp salt
1/2 cup semolina flour, whole wheat flour or white flour
1 cup  (or more) white flour
This simple, painless and quick method of making fresh pasta using a food
processor is much simpler than the length of the instructions, which include directions for dealing with problems, would lead you to believe.
This technique solves the basic problem in pasta making: getting a dough with just the right amount of moisture so that it's neither too soft and sticky nor too dry and hard to work. You start with the moist ingredients (egg and olive oil), then add just enough flour that the dough first gathers into a ball, then breaks up into granules, then gathers itself up again. When that happens, you know you've got just the right moisture content, and you can reward yourself by letting the processor do the kneading for you. The semolina or whole wheat flour that is added first can be used to give the pasta more body (semolina has more gluten than standard flour) or make it more wholesome. They're added first to give these hard-to-work ingredients more chance to dissolve in liquid. You can use as much of them as you like as long as the mixture is still a batter, to give the processor a chance to do its thing.
The first time you make pasta this way, add flour in smaller increments. With experience you'll get a better feel for how fast to proceed, and after three or four batches you'll have a batch of noodles ready in under 10 minutes. Also with experience, you will determine the capacity of your processor; too large a batch will always gum up the works.

Instructions:
Place the eggs, olive oil and salt in the bowl of the food processor and whirl briefly to blend. If using semolina flour or whole-wheat flour, add and process for 15 seconds. This mixture is supposed to make a thick batter, so feel free to add extra flour at this point.
Add remaining flour, 1/2 cup at a time until dough forms a ball. Continue adding flour, 1/4 cup at a time, until the ball breaks up into bead-like granules. If the blob doesn't break up and it doesn't absorb the flour either (that is, you wind up with a blob of dough and flour whirling around in the bottom), then take out the dough and, with the processor running,
feed inch-size pieces of the dough back through the feed chute so that they break up on impact. If the dough is really sticky, add a couple tablespoons of flour first.
If the dough has just the right amount of moisture, it will break up, whirl around for a few seconds, then start gathering itself back up into a ball, ultimately picking up all the stray pieces and rolling around the inside of the processor bowl, making a terrible racket and causing the processor to walk across the counter. When that happens, congratulations! Let it knead itself this way for 15 seconds, then stop the processor, remove the dough to a covered bowl and let it sit for 15 minutes. Proceed to roll it out with machine or rolling pin for the pasta dish of your choice.

If the dough doesn't gather itself up again, it's usually either because it is too dry (it stays granular) or because the gathering process didn't get started properly (it sticks to the inside of the bowl and eventually stops whirling entirely). If the former, add water through the feed chute with the processor running, a tablespoon at a time, until the dough gathers. If
it gathers on the side of the bowl instead of in a ball, then stop the processor, grab some out, form it into a ball, return to the bowl and start the processor again. This will usually pick up the rest of the dough, and off you go. If not, add a tablespoon of flour, process it for a second, and repeat.

Original recipe by Steve Upstill on Chef2Chef Culinary Portal
My pasta machine is driven by commercial 8 quart mixer equiped with foot pedal for easy control.
 This dough needs another tablespoon of flour.
Dough has to be rolled by hand first to fit into rollers.
Sheets of pasta are ready for final processing.


Saturday, January 22, 2011

Wonton Soup

Wonton soup is probably best known Chinese soup in North America. There are many versions of not only fillings but also shape of the dumplings. I usually make the simple traditional triangle wontons. If you have a stock and ground pork on hand it is very simple and fast comfort food to prepare and can be a whole meal in itself, just fill the soup bowl with wontons is all it takes.

Filling:
3/4 lb. lean ground pork
4 green onions, finely chopped
3 tbsp. soy sauce
1 tbsp. sake
1 tsp. sesame oil
1/4 tsp. white pepper
2 tsp. fresh grated ginger
2 tsp. crushed garlic
4 medium shitake mushrooms, soaked and chopped
1 tsp. salt
2 tsp. sugar
wonton wrappers

Broth:
10 cups of chicken stock (canned or carton is fine)
1 tsp chopped ginger
1 tsp. crushed garlic
1 Tbs. soy sauce
1 green onions, chopped diagonally for garnish
Dumplings:
Put all ingredients in a mixing bowl and mix until thoroughly combined.
Working on a flat work surface, lay out a few of the wontons. (Keep remaining wonton wrappers covered with plastic wrap.) Fill a small bowl partially with cool water and set aside. Using a teaspoon measure, place a heaping teaspoonful of the meat filling in the center of each wonton. Using your fingers or brush, lightly wet the edges of the wonton. Bring 2 opposite corners of the wonton together to form a triangle and enclose the filling, pressing edges firmly around the mound of filling to eliminate any air pockets and seal. Assemble the remaining wontons in the same manner. When the wontons are all assembled, set aside.
Soup:
In a sauce pan or soup pot bring stock, soy sauce, garlic and ginger to boil. Carefully drop wontons into soup and stir to separate them. After dumpling come to surface, simmer additional 5 minutes and serve with chopped green onions.

Ready for assembly.
Pres two oposing corners together...
and press around filling to squeeze out air.
Ready for a soup.

Thursday, January 20, 2011

Liver Dumpling Soup

Yes, another dumpling recipe. This comfort soup is one of our favorite soups to go to when it is miserable outside. It is too bad that many people would never give a second look at anything that has a liver in it. I use very fresh calf or baby beef liver for these dumplings and you can’t detect any liver taste or smell at all. As is the case with most soups you can easily control how substantial the soup is just by modifying ratio of stock to solids, in this case number and size of dumplings and amount of egg noodles and vegetables.

For dumplings:
Baby beef or Calf liver, 1 slice
1 egg, beaten
1/4 cup milk
1/2 tsp. white pepper
1 tsp. salt
Garlic, 2 cloves, chopped
1/2 tsp. marjoram
1 tsp. baking powder
1/2 cup bread crumbs mixed with 1 Tbs. flour/
Breadcrumbs, as required
Soup:
8 cups beef or chicken stock, carton or can is fine
1 large carrot
1/2 medium onion
1 stalk celery, all finely chopped
Marjoram
Garlic, finely chopped
Fine egg noodles
Parsley

Remove all traces of membrane on liver, roughly chop and then run through grinder or food processor to make a coarse paste. Remove to mixing bowl and add beaten egg, milk, salt, pepper, baking powder and marjoram and mix till well combined. You will now have fairly thin batter. Add 1/2 cup of bread crumbs with flour, mix well and let it rest for 10 minutes or so for bread crumbs to absorb moisture from liver mixture. Remix and add adjust with more bread crumbs or milk until you can form a ball. Form walnut size balls and set aside.
To make soup pour in stock  into a soup pot, drop in all chopped vegetables and bring to boil. Cook for 5 minutes and then drop in all liver dumplings, being careful not to splash hot stock. Gently lift dumplings with spatula from bottom so they don’t stick. When all of them are floating on top, cover and simmer for 5 minutes. Add fine noodles and stir to prevent noodles from sticking together. Cook additional 5 minutes, add marjoram, taste and  adjust seasoning. Serve with chopped parsley sprinkled on top.

Monday, January 17, 2011

Ham, Sauerkraut and Potato Dumplings

Chlupaté Knedlí s Uzenou Šunkou


This is a true comfort food and once you have made dumplings it is a cinch to put together. Just cook ham any way you prefer, boil, bake or braise, cook sauerkraut and serve with potato dumplings.
I bought shank end of bone-in smoked ham that came in at 4.5kg or 10lb, put it in large cast iron Dutch oven and poured in water about half way up the meat. It took 3-1/2 hours at 350°F to braise, covered, for a fall-off-the-bone done. Nice no-work method. Not only did I end up with great, tender ham, but now I have 2-1/2 quarts of fantastic ham stock for pea soup as well. Nice bonus. One thing I will change next time is that I will not cut the skin in diamond pattern, I will leave the skin whole. Since I like the nice chewy texture of the pork skin but not all that fat underneath, it will make the job of removing extra fat much easier.
Even though this meal looks fairly light, is quite filling. It will become a Winter standard.

Sunday, January 16, 2011

Potato Dumplings


Potato dumplings are somewhat similar to Gnocchi in that main ingredients are potato, flour and egg except these dumplings are made either with grated raw potatoes entirely or cooked and raw combined. Also, some use only flour as a binder while others use only farina (cream of wheat), then there are recipes that use both in all sorts of proportions. There are literally hundreds of recipes in Czech Republic for potato dumplings. Every region, city, village and family has their own. Actually, I think that same is true about any peasant dish in any culture. Since I’ve been making gnocchi for a while now and am comfortable with potato based dough I came up with my own version.

1 raw Russet potato, peeled and grated fine
1 Russet potato, “baked” in microwave (see Gnocchi recipe)
1 egg, beaten
1/3 c. farina (cream of wheat)
1/3 c. flour
1 tsp. baking powder
Salt and white pepper to taste

Peele and rice cooked potato in food mill. You can grate cooked potato using box grater or, to be more rustic put it in heavy plastic bag and smash it with heavy frying pan J.
Mix raw and cooked potatoes together with the beaten egg. Sift together farina, flour, salt, pepper and baking powder and fold in potato mixture. The dough should be stiff enough to form a small ball.
Bring salted water in a large pot to roiling boil. With soup spoon form balls little smaller then golf ball. When all dumplings are ready drop them gently into boiling water. Dumplings should loosely cover the bottom in one layer. When water comes back to boil lower the temperature to gentle boil. Release dumplings that stuck to bottom of a pot and boil for 15 minutes.
When done, remove with slotted spoon to preheated frying pan with some bacon fat or lard and coat lightly.
Sprinkle with dry toasted bread crumbs and serve.
Potato dumplings are traditionally served with sauerkraut and smoked meat.
Release dumplings that stuck to bottom
Once on surface boil for 15 minutes.
Drain and fry in bacon fat.

Frittata with rice vermicelli leftover

I consider this the best way to recycle leftover of “Rice vermicelli with vegetables”. The ratio of leftover and eggs was about 2:1. I used 5 eggs and 2-1/2 cups of vermicelli, veggies and meat. Just beat the eggs with little salt, mix thoroughly with leftovers, pour in fairly hot non-stick frying pan and cover. Lower the temperature and cook till top of frittata is set. Now you have two options: slide it on a plate and turn over back to frying pan or slide frittata on steel preheated pie pan and place under broiler (my option, using toaster oven set at 450 °F broil). When eggs are cooked through it is ready to serve. As with any frittata this one is even better at room temperature.

Almost ready for broiler.

Friday, January 14, 2011

Barbequed Chinese Pork Ribs

Char Siu Ribs
Barbeque pork is used in many Chinese recipes from soups, appetizers, stir fried rice and noodle to on their own with a bowl of rice. I used same marinade for my pork back ribs. After 3 hours of slow roasting in sealed aluminum bag at 290 °F and hit of open broil at 400 °F for 30 minutes they came out nice a sticky, fall-off-the-bone done. What a treat! Maybe I should file it under Dessert, really.
Makes about 2-1/2 cups
The sauce:
Hoisin sauce, 3/4 cup
Soy sauce, 1/2 cup
Rice wine or dry sherry, 1/2 cup
Honey, 1/3 cup
Sugar, 1 tablespoon
1 Tbs. minced garlic
1 Tbs. minced ginger.
2 tsp. Chinese 5-spice powder
Put all ingredients in small sauce pan and simmer, covered, for 10 – 15 minutes stirring frequently. Strain through strainer to remove any solids and save in a jar.
Ribs:
Remove membrane covering the rib side of rack.
Preheat oven to 350 °F.
Take a piece of heavy aluminum sheet that will generously cover the ribs in a sort of sealed bag.
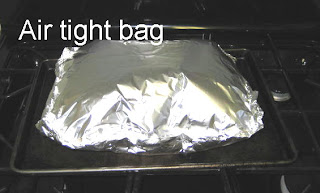
Place ribs meat side down at one end of foil and brush with Char Siu sauce. Turn over rib side down (be careful not to pierce the foil!!!) and rub meat generously with the sauce. Fold over the foil and seal sides by folding over the foil several times. Through the remaining open side pour in about 1/3 cup rice wine, fold the foil over several times to make airtight bag and place on baking sheet.
Place in middle of preheated oven and bake for 30 minutes.
Lower the temperature to 290 °F without opening oven door and cook for 2 hours.
After 2-1/2 hours in the oven raise the temperature to 375°F and remove the ribs.
Cut “X” in the aluminum bag being careful about steam that will inevitably escape. Roll or bend foil to open the bag, brush with more sauce and return to oven for another 30 minutes or till golden brown.
When golden brown, remove and cut into individual rib sections.
Serve with rice but we always eat ribs with rye bread. Don’t ask, just try it, you will like it. Excellent combo, just like a rye bread, chocolate and beer. Best dessert ever J !


Cut the bag open after 2 1/2 hours
Fold over the foil, brush with more sauce and return to 375°F oven for another 30 minutes.
Ready to be cut and plated.


Thursday, January 13, 2011

Using Whole Side of Atlantic Salmon

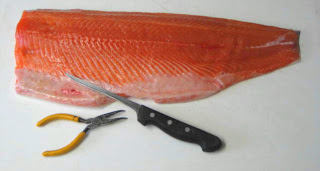
Every time one of our supermarkets has a good special on fresh New Brunswick salmon fillet I buy whole side and break it up myself. Also, I always call the store and ask exactly when the will receive new shipment and buy it as soon as it is available. I never buy from display case because when I get to the fish counter the salmon is still in a box fresh from a truck.
First thing I do is wipe it clean and remove any bones left behind.
This time I wanted to make more Gravlax so two big chunks went there with skin on. Next 2 pieces were cut for dinner that night (Pan Seared Fillet of Salmon) and tail section and belly were used for sashimi and 3 Sushi Rolls cut into 18 pieces, enough for two of us to munch on whole day! The two fillets and tail were skinned.
For me, this is a way to go when it comes to salmon. I have to mention that salmon freezes extremely well. I usually freeze it in serving pieces and when frozen solid I vacuum pack.
Left to right: Gravlax, 2 fillets, 2nd side for Gravlax and tail for sushi roll and sashimi. Very frugal way to buy salmon.

Sushi Roll

When I bought whole side of salmon I saved tail end for sushi roll and sashimi. I do not use ton of ingredients that you will see in California roll. For us it is just sushi rice, nori (sushi seaweed), cucumber or avocado, salmon, wasabi paste and sesame seeds. There is a website dedicated to sushi making called Sushi Encyclopedia that has very detailed instructions so there is no point for me to go into a great detail.
Here is how I did it.
Clockwise from top left: rice, salmon, sesame seeds, cucumber, wasabi and nori.
Sesame seeds are sprinkled on rice, then salmon a cucumber goes on top and wasabi paste on top of salmon. Ready to roll.
Roll is ready to be cut first in half, then clean cut the ends and finally put 2 halves together and make 3 equal slices. You have 6 slices ready to be served with soy sauce and pickled ginger.